 Pin It
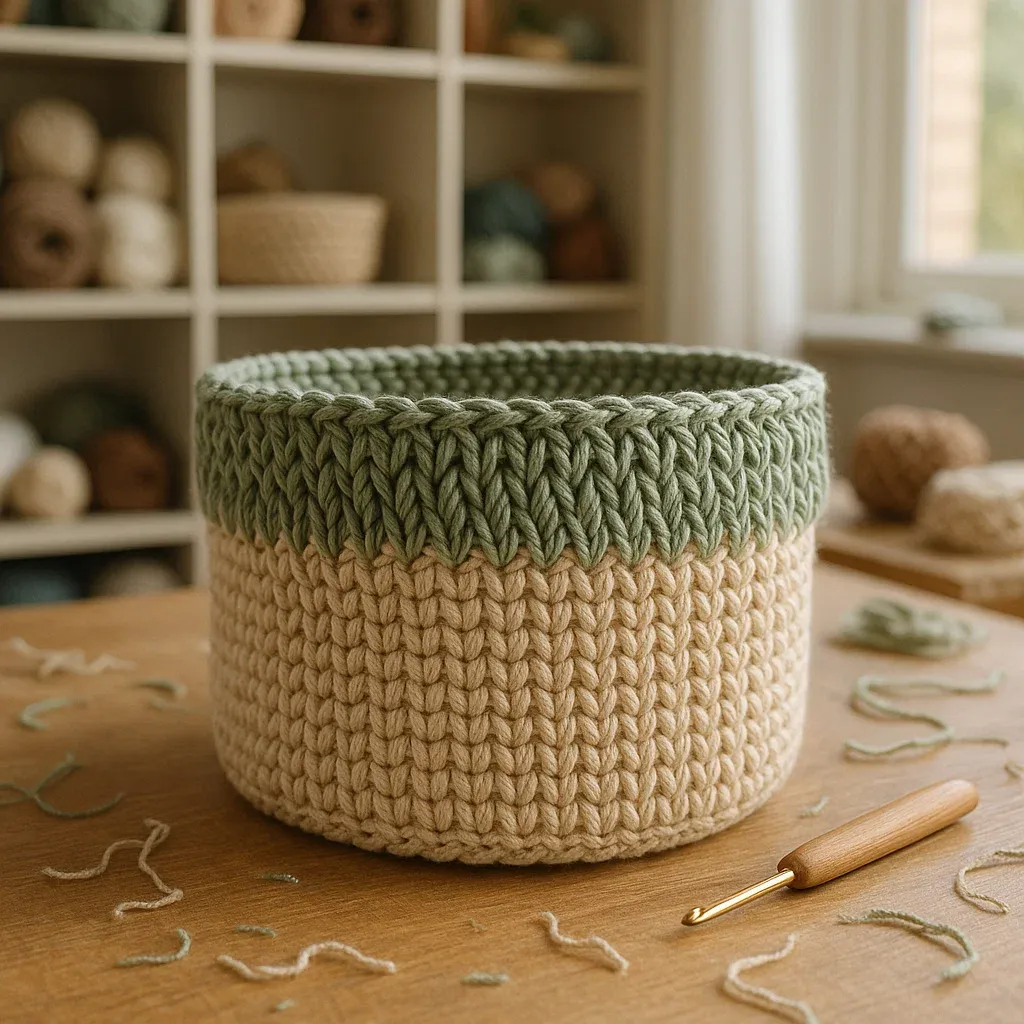
Creating a functional and beautiful crochet storage basket transforms any space while building essential skills that every crocheter should master. This modern storage basket pattern combines the reliability of single crochet with the sophisticated texture of spike stitches, resulting in a sturdy container perfect for organizing everything from bathroom essentials to craft supplies. The spike stitch technique creates dramatic visual interest without requiring advanced crochet knowledge, making this project accessible for confident beginners while offering experienced crocheters a quick, satisfying make.
Working with doubled yarn strands ensures your finished basket maintains its shape and stands upright, solving the common frustration of limp, collapsing handmade containers. This technique also builds foundation skills for future projects requiring structural integrity, such as market bags, plant holders, and decorative vessels. By mastering this pattern, you'll understand how yarn weight, hook size, and stitch placement work together to create functional crochet items that rival store-bought alternatives. The color-changing spike stitch rim adds a contemporary touch that complements modern home décor while showcasing your growing technical abilities.
 Pin It
I've taught this pattern to dozens of students over the years, and it never fails to boost confidence while producing genuinely useful results. The moment students master the spike stitch placement, their faces light up as they realize how simple techniques can create sophisticated-looking textures. Many return to show me bathroom makeovers, office organization systems, and gift baskets they've created using variations of this fundamental pattern.
 Pin It
Materials & Tools You'll Need
- Yarn: Worsted weight cotton or cotton blend (approximately 200-300 yards) - Cotton provides the structure and washability essential for storage baskets, while maintaining stitch definition that showcases the spike stitch texture. Paintbox Cotton DK, Bernat Softee Baby Cotton, or Lion Brand 24/7 Cotton work excellently for beginners.
- Crochet Hook: Size H/8 (5.0mm) - This size creates the perfect balance between tight enough stitches for structure and loose enough tension for comfortable working. Smaller hooks create overly dense fabric, while larger hooks compromise basket stability.
- Tapestry Needle: Large eye for easy yarn threading - Essential for weaving in ends securely, as loose ends can compromise basket durability with regular handling and washing.
- Sharp Scissors: For clean yarn cuts - Clean cuts prevent fraying and make finishing work much easier, particularly when working with cotton fibers that can split.
- Stitch Markers: Optional but helpful for round beginnings - Particularly useful when learning to identify round transitions and maintaining consistent stitch counts.
Step-by-Step Instructions
 Pin It
- Create the Foundation Base:
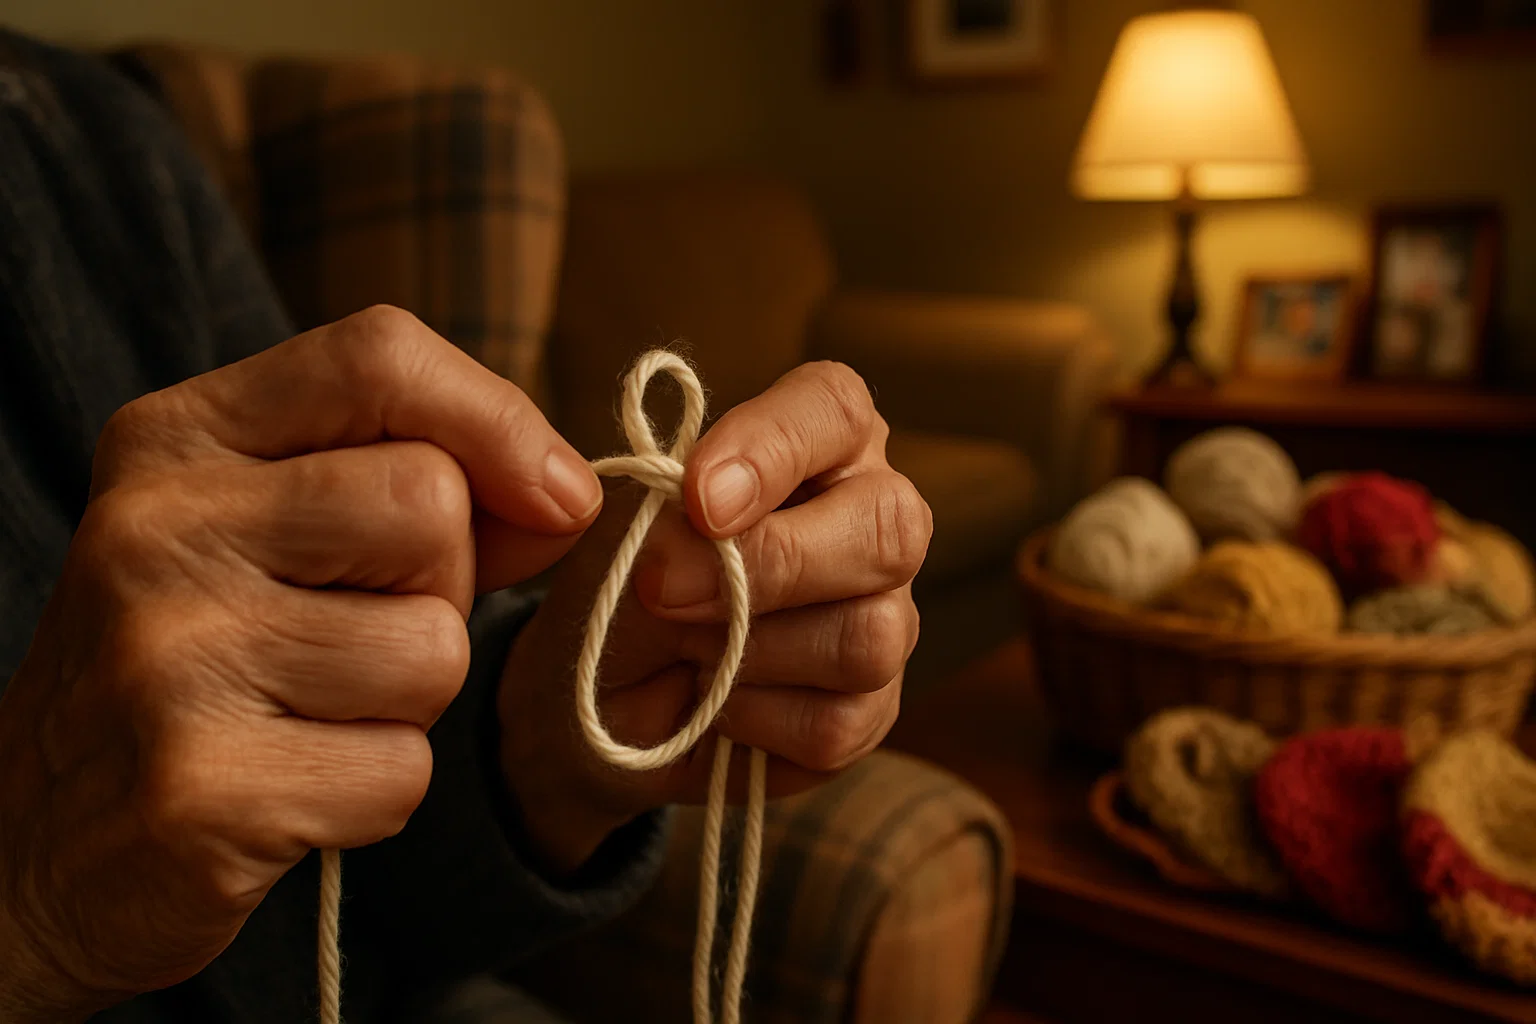
- Begin with a magic ring, holding two strands of your main color yarn together throughout the entire project. Work 6 single crochet stitches into the ring, then pull the tail tight to close completely. This doubled yarn technique immediately establishes the structural integrity your basket needs. Join with a slip stitch to the first single crochet, then chain 1 to begin the next round. Count your stitches carefully - foundation errors multiply as you work outward.
- Establish the Increase Pattern:
- Work 2 single crochet stitches in each stitch around (12 stitches total). The key to maintaining a flat base lies in consistent increases that distribute evenly around your work. If your base begins cupping upward, your increases are too aggressive; if it ruffles, you need more increases. Continue this methodical increasing pattern through Round 12, adding 6 stitches per round while maintaining perfect tension consistency.
- Build the Straight Sides:
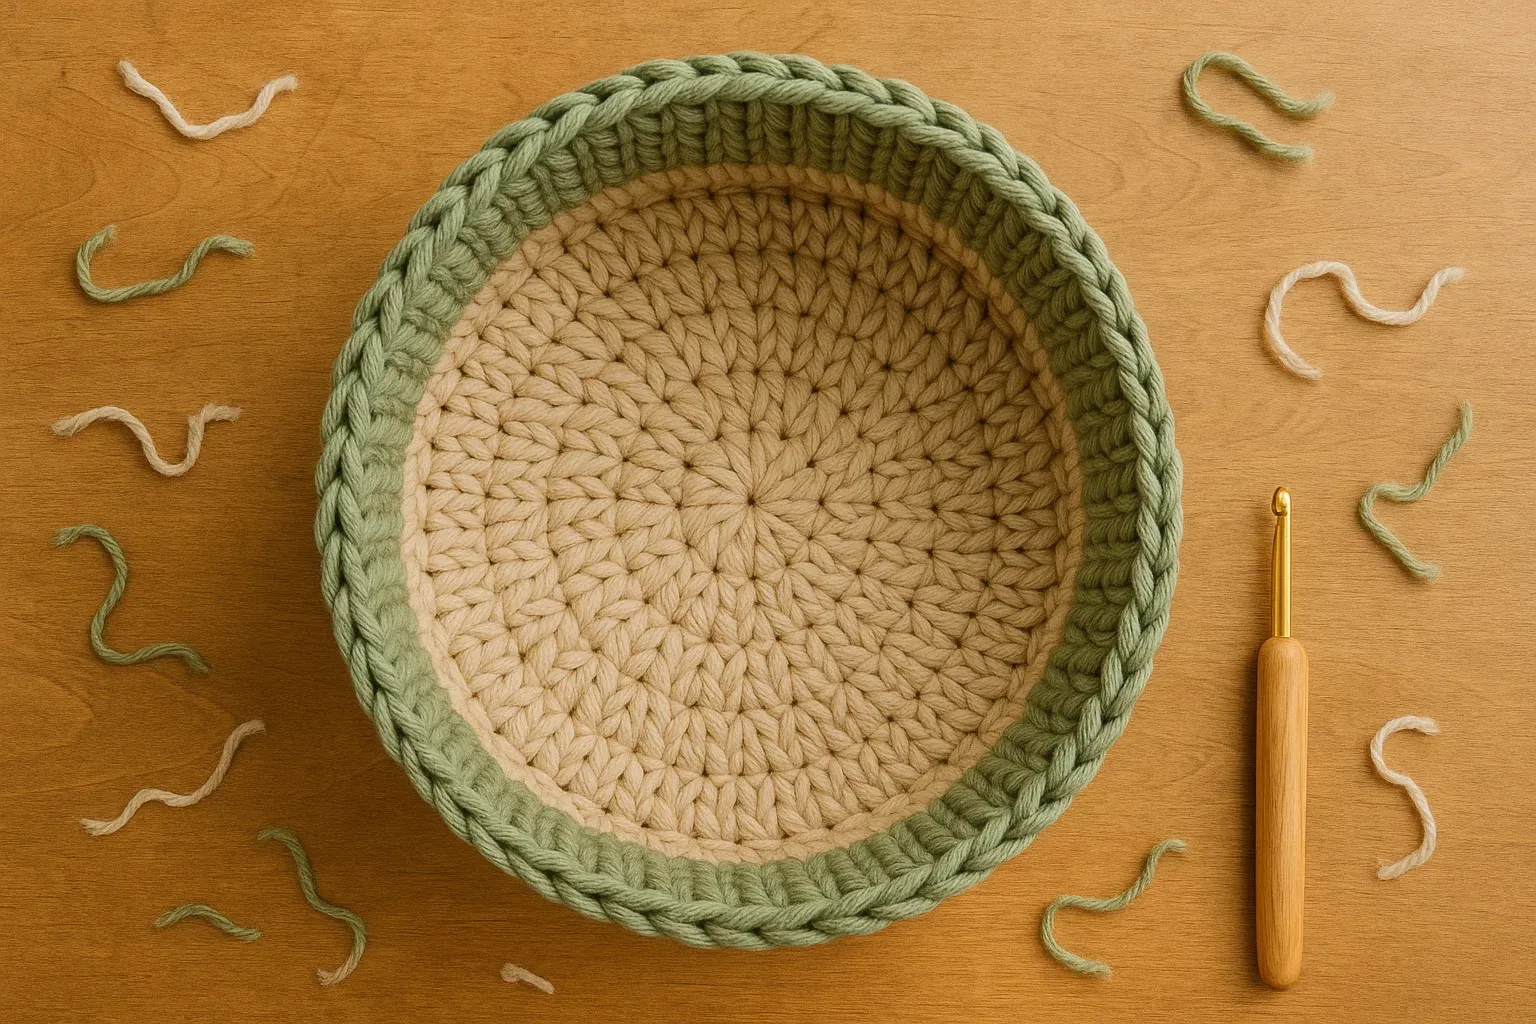
- Once your base measures your desired diameter (approximately 5-6 inches for a medium basket), work even rounds without increases. Place one single crochet in each stitch around for 8 rounds, maintaining the doubled yarn technique. This creates the vertical walls that give your basket its functional depth. Keep your tension slightly looser than the base to allow easy stitch insertion while maintaining structural integrity.
 Pin It
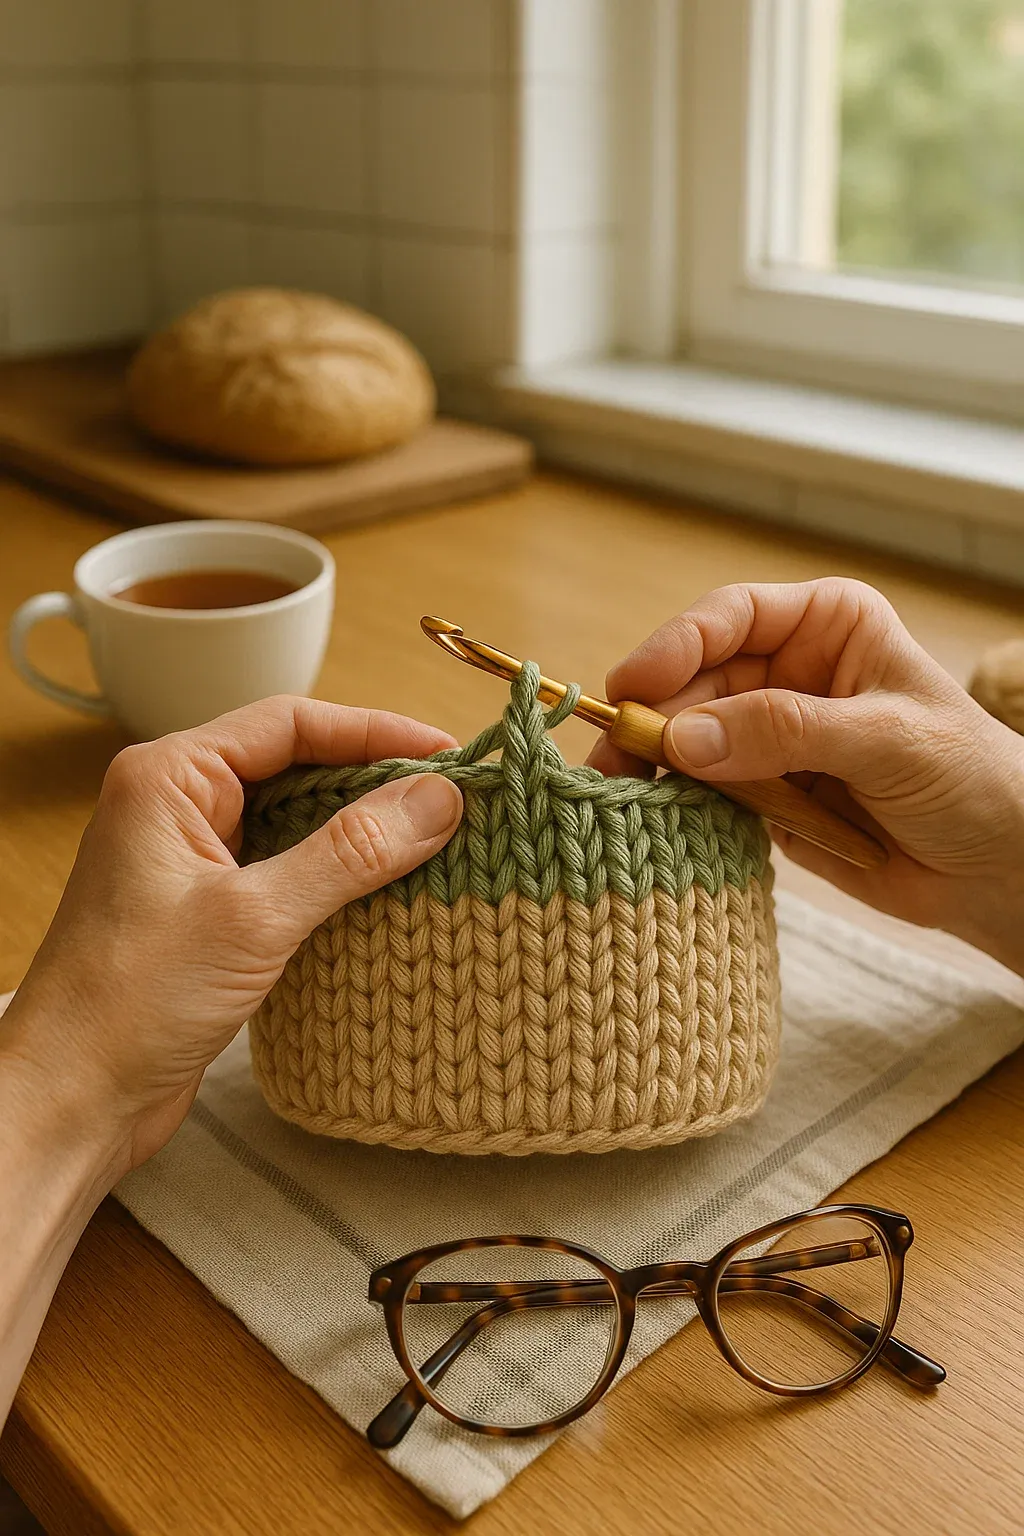
- Master the Spike Stitch Technique:
- Switch to your accent color and begin the decorative rim. Insert your hook into the base of the stitch (the horizontal loop below the previous round's stitches) rather than the top loops. Pull up a loop to match the height of your current round, creating an elongated stitch that spans two row heights. This technique creates the dramatic textured effect while using familiar single crochet mechanics.
- Create the Alternating Spike Pattern:
- Alternate spike stitches with regular single crochet stitches, creating a checkerboard effect. Round 21 begins with spike stitches, while Round 22 staggers the pattern by starting with regular single crochet. This alternation creates the sophisticated geometric texture that makes this basket special. Work 5 rounds total, maintaining consistent tension throughout the color change.
- Finish with Professional Edge:
- Complete your final round with slip stitches around the rim, skipping the initial chain 1. This creates a clean, finished edge that won't curl or stretch with use. Cut your yarn leaving a 6-inch tail, then use your tapestry needle to weave all ends securely through the back loops of several stitches before trimming excess.
Complete Modern Storage Basket Pattern
Skill Level: Confident Beginner
Finished Size: Approximately 6 inches diameter x 4.5 inches tall
Yarn Weight: Worsted Weight (4) Cotton or Cotton Blend
Pattern Abbreviations:
ch = chain
sc = single crochet
sl st = slip stitch
st(s) = stitch(es)
rep = repeat
MC = main color
AC = accent color
[ ] = repeat instructions within brackets
( ) = stitch count at end of round
Special Stitches:
Single Crochet Spike Stitch: Insert hook into the base of the designated stitch (the horizontal strand one round below), yarn over and pull up a loop to match the height of your current working round, yarn over and pull through both loops on hook.
Pattern Notes:
Work with two strands of yarn held together throughout entire pattern
Do not join rounds unless specified
Use stitch marker to mark beginning of each round
Maintain consistent tension for structural integrity
Pattern Instructions
Base Construction:
Using MC and holding 2 strands together:
Round 1: 6 sc in magic ring. Pull ring closed, sl st to first sc. (6)
Round 2: Ch 1, 2 sc in each st around. Sl st to first sc. (12)
Round 3: Ch 1, *sc in next st, 2 sc in next st; rep from * around. Sl st to first sc. (18)
Round 4: Ch 1, *sc in next 2 sts, 2 sc in next st; rep from * around. Sl st to first sc. (24)
Round 5: Ch 1, *sc in next 3 sts, 2 sc in next st; rep from * around. Sl st to first sc. (30)
Round 6: Ch 1, *sc in next 4 sts, 2 sc in next st; rep from * around. Sl st to first sc. (36)
Round 7: Ch 1, *sc in next 5 sts, 2 sc in next st; rep from * around. Sl st to first sc. (42)
Round 8: Ch 1, *sc in next 6 sts, 2 sc in next st; rep from * around. Sl st to first sc. (48)
Round 9: Ch 1, *sc in next 7 sts, 2 sc in next st; rep from * around. Sl st to first sc. (54)
Round 10: Ch 1, *sc in next 8 sts, 2 sc in next st; rep from * around. Sl st to first sc. (60)
Round 11: Ch 1, *sc in next 9 sts, 2 sc in next st; rep from * around. Sl st to first sc. (66)
Round 12: Ch 1, *sc in next 10 sts, 2 sc in next st; rep from * around. Sl st to first sc. (72)
Basket Sides:
Rounds 13-20: Ch 1, sc in each st around. Sl st to first sc. (72)
Spike Stitch Rim:
Change to AC, continue holding 2 strands together:
Round 21: Ch 1, *spike st in base of next sc, sc in next st; rep from * around. Sl st to first st. (72)
Round 22: Ch 1, *sc in next st, spike st in base of next sc; rep from * around. Sl st to first st. (72)
Round 23: Repeat Round 21.
Round 24: Repeat Round 22.
Round 25: Repeat Round 21.
Finishing Round:
Round 26: Working without ch 1, sl st in each st around to create clean finished edge. Sl st to first sl st.
Fasten off, leaving 6-inch tail. Weave in all ends securely using tapestry needle.
I personally prefer working with 100% cotton for storage baskets because the fiber's natural structure provides longevity that acrylic cannot match. My family has learned to request these baskets as gifts because they've seen how well they hold up to teenager bedroom chaos and bathroom humidity. The spike stitch technique has become my go-to method for adding visual interest to any circular project without complicated stitch pattern memorization.
Troubleshooting Common Problems
Working with doubled yarn can initially feel awkward, but maintaining consistent tension becomes natural with practice. If your strands begin separating, pause frequently to twist them together, maintaining the unified working yarn throughout each stitch. Beginners often struggle with spike stitch height consistency - your elongated loops should match the height of regular single crochet stitches in the current round, not stretch taller or pull shorter.
Count your stitches obsessively during the base construction phase. Missed increases create permanent flat spots, while extra increases cause ruffling that cannot be corrected later. If you discover counting errors early, it's worth ripping back to fix them rather than continuing with a flawed foundation. Mark your round beginnings with stitch markers until the pattern becomes automatic.
Customization and Size Variations
This pattern adapts beautifully to different dimensions and purposes. For smaller desk organizers, stop base increases at Round 8 and work only 4 straight rounds before beginning the spike stitch rim. Larger laundry baskets require continuing increases through Round 15 or 16, then working 12-15 straight rounds for adequate height. Always maintain the 6-stitch increase per round ratio to prevent base cupping or ruffling.
Experiment with different accent color placements throughout the spike stitch rim. Single accent rounds create subtle highlights, while multiple color changes produce bold geometric patterns. Some of my students have created beautiful ombré effects by gradually shifting through related color families across the textured rim section.
Advanced Techniques and Finishing
Professional finishing separates handmade items that look homemade from those that rival commercial products. Steam blocking your completed basket helps settle the stitches and enhance stitch definition, particularly in the spike stitch sections. Pin your damp basket over a appropriately sized bowl, allowing it to dry completely in the desired shape.
Consider adding fabric lining for extra stability and a polished interior appearance. Cut fabric slightly larger than your basket base and sides, then hand-stitch in place along the rim. This technique also provides additional structure for heavier storage items while creating a beautiful contrast against your crochet work.
Yarn Selection and Fiber Considerations
Cotton remains the superior choice for storage baskets due to its natural structure and washability, but cotton blends offer interesting alternatives. Cotton-bamboo blends provide natural antimicrobial properties perfect for bathroom storage, while cotton-linen combinations create rustic textures ideal for farmhouse décor styles. Avoid pure acrylic for structural projects, as it lacks the fiber memory necessary for maintaining basket shape over time.
Weight consistency matters more than specific brand selection. Mixing different cotton yarns within the same weight category works well, but combining different weights creates tension problems that compromise final appearance. Purchase slightly more yarn than calculated - running out mid-project often means settling for less-than-perfect color matches.
 Pin It
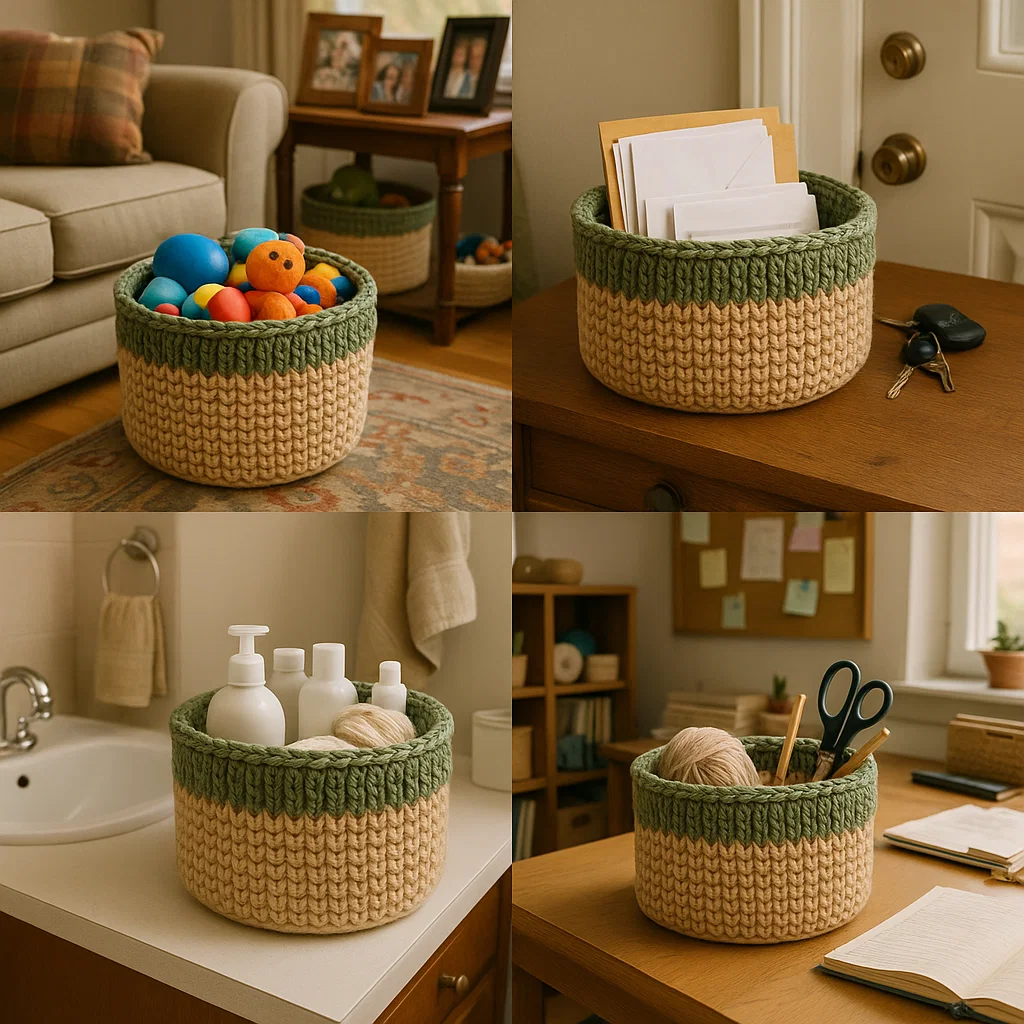
Creative Project Applications
Master this basic basket structure, and you've unlocked countless project possibilities. Shallow versions become perfect bread baskets or fruit bowls when worked in food-safe cotton yarns. Tall, narrow variations organize craft supplies, hold walking sticks, or store rolled towels in linen closets. The spike stitch rim technique translates beautifully to hat brims, bag flaps, and decorative pillow edges.
Consider seasonal variations using appropriate color combinations. Spring baskets in soft pastels organize Easter decorations, while rich autumn tones create perfect harvest displays. Winter baskets in creams and grays complement neutral décor schemes, and bright summer combinations add cheerful storage to outdoor entertaining areas.
Building Your Crochet Skill Foundation
This pattern introduces several techniques that form the foundation for advanced crochet projects. Working in the round with consistent increases prepares you for hat crowns, bag bases, and other circular constructions. The spike stitch technique appears in countless decorative applications, from blanket borders to sweater details. Managing doubled yarn builds the tension control necessary for structural crochet projects like market bags and plant hangers.
Use this project as a testing ground for color theory and design principles. The simple structure allows you to focus on how colors interact without worrying about complex stitch pattern execution. Document your successful color combinations for future reference - these insights will inform countless future projects.
Storage baskets represent the perfect intersection of functional crochet and skill building, offering immediate practical value while teaching techniques that enhance every future project. The satisfaction of creating beautiful, useful items that improve your living space while building expertise creates a positive feedback loop that keeps crocheters engaged and motivated. Take time to experiment with this pattern, try different color combinations, and adapt the sizing to meet your specific storage needs - these variations will teach you more about crochet construction than dozens of rigid pattern repetitions.
Frequently Asked Questions
- → What type of yarn is best for storage baskets?
- Cotton yarn is ideal for storage baskets because it's sturdy, washable, and holds its shape well. Choose a worsted weight (4) cotton yarn for the best structure. Avoid acrylic yarn as it can stretch out over time, and wool isn't practical for items that may need frequent washing.
- → How do I make my baskets more structured and sturdy?
- To create sturdy baskets, work with a smaller hook than recommended for your yarn weight, keep consistent tension, and consider holding two strands of yarn together for extra thickness. You can also add interfacing or cardboard to the bottom, or use fabric stiffener spray once completed.
- → Can beginners make these storage baskets?
- Absolutely! This pattern uses only basic stitches - single crochet and half double crochet. If you can make a chain, single crochet, and work in rounds, you can complete these baskets. The tutorial includes detailed instructions and tips for maintaining even tension and counting stitches.
- → How do I prevent my basket from curling or becoming lopsided?
- Curling usually happens when you increase too quickly or have uneven tension. Count your stitches carefully in each round and maintain consistent tension throughout. If your work starts to ruffle, you're increasing too much. If it's cupping, you need more increases. Blocking the finished basket can also help achieve the perfect shape.
- → What sizes can I make with this pattern?
- The pattern includes instructions for small (6 inches), medium (8 inches), and large (10 inches) baskets. You can easily adjust the size by adding or reducing rounds. For custom sizes, increase the base until it's your desired width, then work even rounds for the height you want.
- → How do I attach sturdy handles that won't break?
- The pattern includes reinforced handle construction using double strands of yarn and multiple rows of single crochet. For extra durability, you can insert rope or cord inside the handle before crocheting over it, or add leather strips sewn securely to the basket sides for a modern mixed-media look.